Haunted Mansion Halloween decorations
Every year in August I coordinate a campground-wide Halloween celebration where everyone decorates their sites. This year our site was decorated with handmade Disney’s Haunted Mansion Halloween decorations, based on the Disney World Haunted Mansion ride, not the movie.
We also have a bunch of activities for the kids such as a haunted hayride, a treasure hunt, a costume parade and contest, as well as trick-or-treat. And the night usually ends with the older folks visiting the sites for some adult beverages. All in all it’s a fun-filled night for kids as well as adults.
More and more seasonals are participating in the event and this year they really brought it! We had everything from a scary carnival, the Pemi River hospital complete with COVID shots (alcoholic shots), to our Haunted Mansion and some typical Halloween props like witches and skeletons.
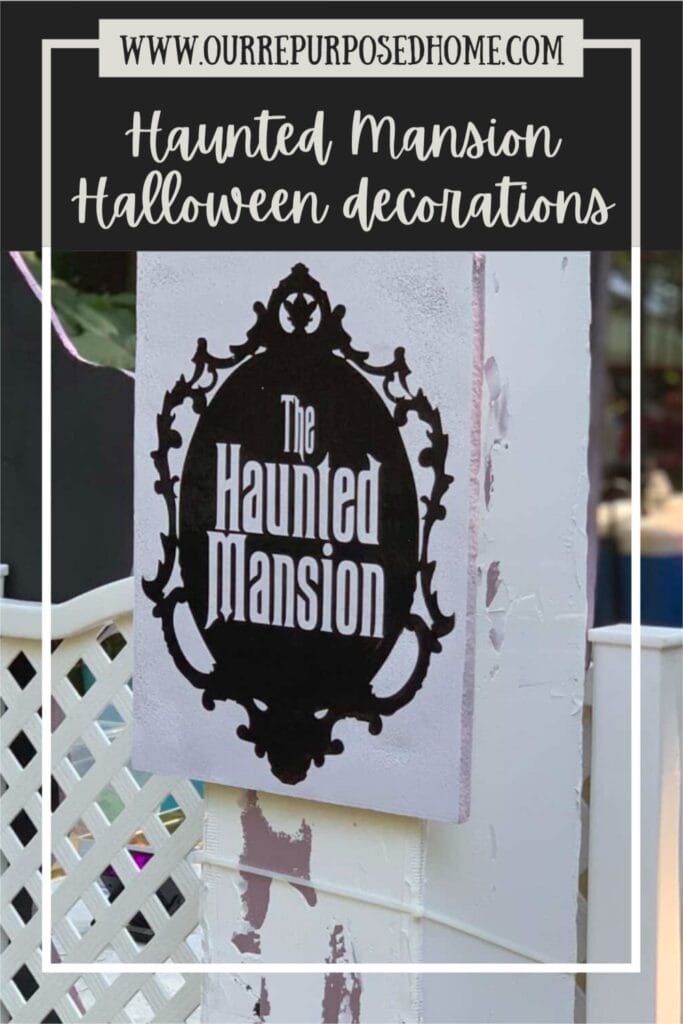
This was a very special celebration for me this year because not only do I LOVE Halloween, but I also LOVE Disney and LOVE the Haunted Mansion ride. I’m a little bumbed out though because I feel like this was the best theme I ever had, or will have. I mean really…How can you compete with that?
The good news is that we will probably be home this year for real Halloween instead of at Disney, so I could actually recreate the scene at my home and do it all over again! That would be fun!
And this year almost didn’t even happen! I hurt myself and had been pretty much on the couch for almost a month and at that point, I hadn’t finished any of the props yet. Just as I was about to call it quits, my family stepped up and volunteered to finish everything for me! We spent an entire day painting, building, and decorating all the props I had planned, and I wouldn’t have been able to do any of it without them. Turns out I’m really good at barking orders…LOL Special thank you to you all. LOVE YA
Anyway, I thought I’d share some of our Haunted Mansion Halloween decorations with you in case you want to try and have your own themed Halloween party. In addition to the images below, there is a video below that takes you through the entire walk-through. Enjoy!
This post may contain affiliate links. If you choose to purchase a recommended product, I may receive a small commission at no additional cost to you. Rest assured that I will not recommend any product that I would not use myself. For our full policies and disclosures click here.
Haunted mansion signs and Haunted mansion font choice
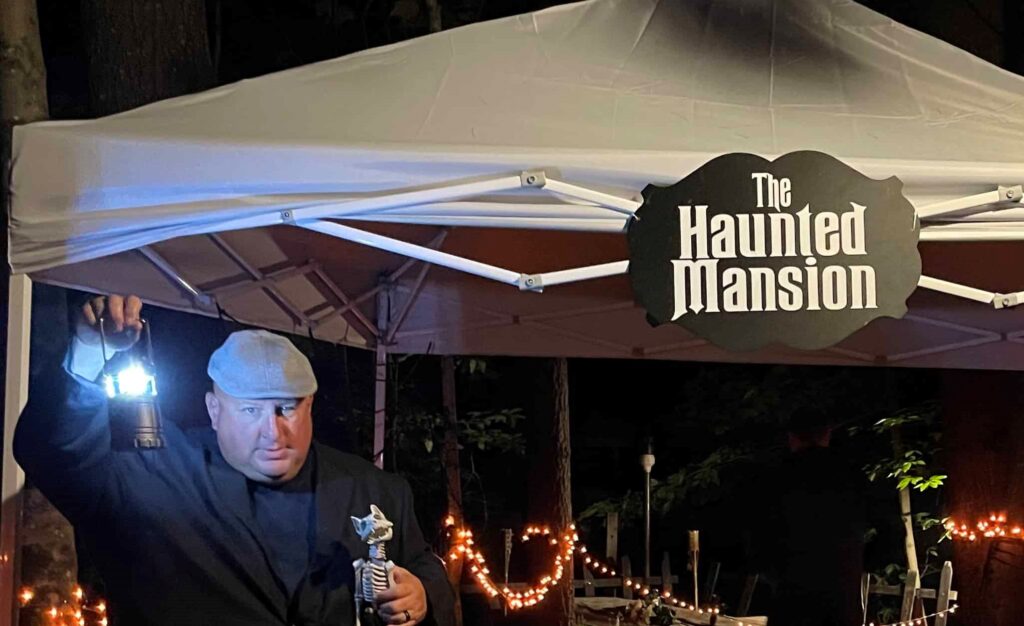
I made some signs by using my Cricut machine to design and cut letters. The first sign I made was “The Haunted Mansion” sign that we hung at the entrance to our campsite. I happened to have a tin magnet/chalkboard laying around that was the perfect shape and size for my sign! That never happens. LOL
The Haunted Mansion font I used was called “Ravenscroft”. If you don’t have access to this font you can download it here for free at 1001 Fonts.
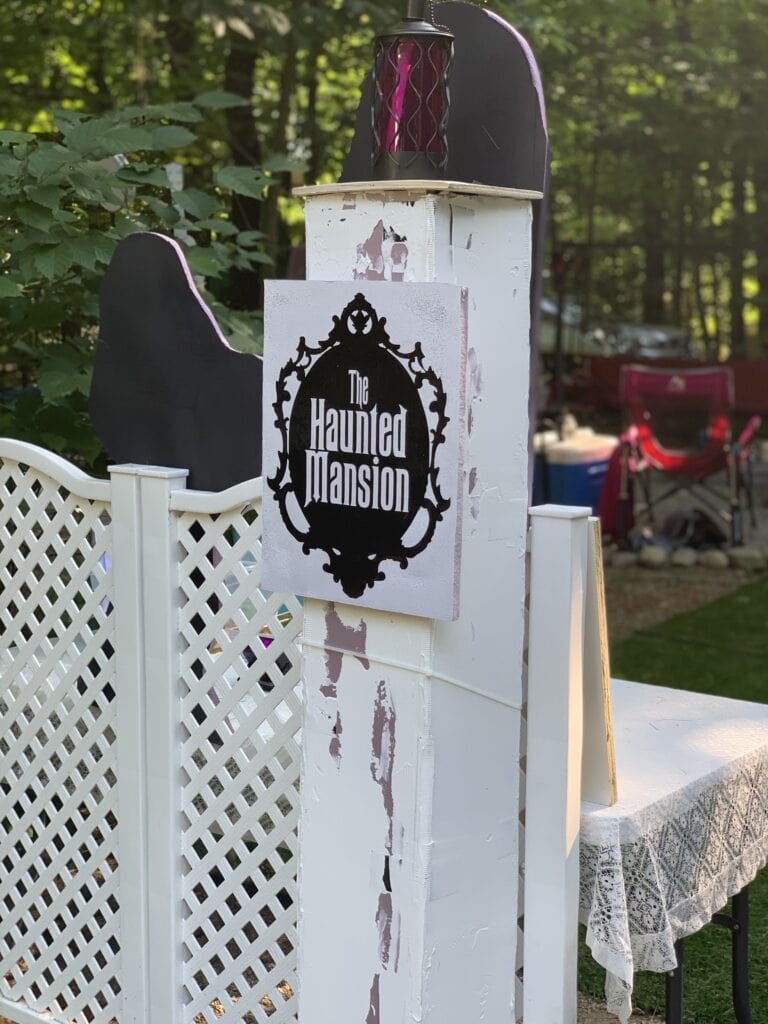
The next sign was for two columns, that I also made, to flank the fence opening to our site. I used the same font “Ravenscroft.” I made the columns out of foam board that I duct-taped together and then covered with joint compound. I applied it very liberally and messy to give it a cement-like texture. I meant to paint it afterward but never got to it. I think it added to the effect with the grayish color of the joint compound.
I glued a scrap piece of thin plywood to the top to cap it off and then set a gas lantern on top. Ignore the black blob behind it. That is the back of a hitchhiking ghost and you don’t see it when it gets dark. It just looks a little weird in the picture.
The next sign I made was the “Welcome Foolish Mortals” sign. This was also the Ravenscroft font but I made the scroll design inside Cricut Design Space. I applied the design to a piece of plywood that was from my old built-ins that I just demolished. I’m glad I was able to reuse it for something else.

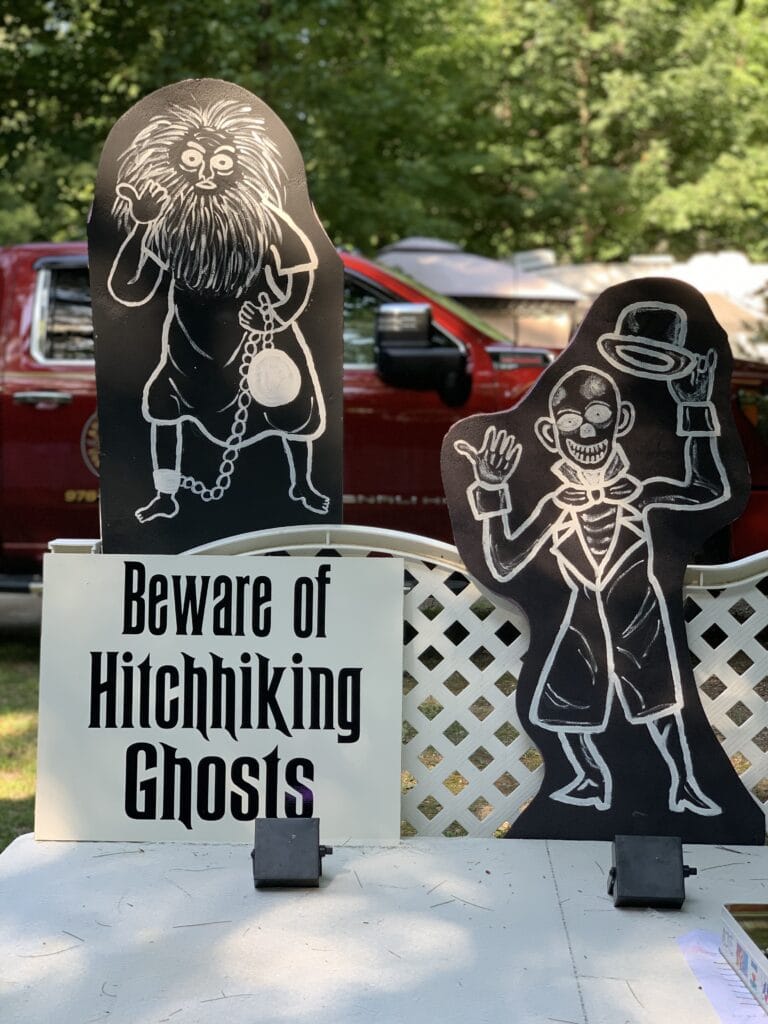
And the last sign was “Beware of hitchhiking ghosts”. This was also the same font and applied to a piece of painted plywood. The hitchhiking ghosts were made out of foam board that I painted black. Then I traced the images onto them using a projector and painted them with white glow in the dark paint.

You might like this…
If you like this post, be sure to check out my other Halloween prop tutorials at the bottom of the page and this one where I show you how to make Nightmare Before Christmas outdoor props!
Haunted Mansion coffin scene
This turned out to be my favorite Haunted Mansion Halloween decoration. I built the actual coffin out of foam board that I wrapped with faux wood contact paper. Then I lined the inside with some fabric that I purchased years ago and never used. All I did was fold over the edge of the fabric and duct-taped it to the outside edges. Easy…and it stayed pretty well even though we had humid and rainy weather.

The coffin top was also made of foam board that I spray painted with beige stone paint over a black base to give it a stone-type look. I wanted it to look heavy and I think it worked.
I put a skeleton inside, holding up the top, a spotlight with a green bulb, and then surrounded it with dead flowers. I got myself in a little bit of trouble when I asked in a town FB group if anyone had any dead funeral flowers. Evidently, that was offensive. But, people who knew me quickly came to my rescue and turned the conversation around to how much fun I have with Halloween. Phew…Me and my crazy ideas! I just posted this picture so hopefully, it will all make sense now and they don’t all think I’m just some crazy person! LOL
The final touch (not in the photo) was the fog machine! It just really made the scene super creepy.
haunted mansion hall of mirrors
One of the first scenes in the Haunted Mansion ride is the hall of mirrors. In this seemingly never-ending hallway is a floating chandelier. I was able to create this same effect by hanging a chandelier with battery-operated candles from a tree branch with fishing wire.

haunted mansion door
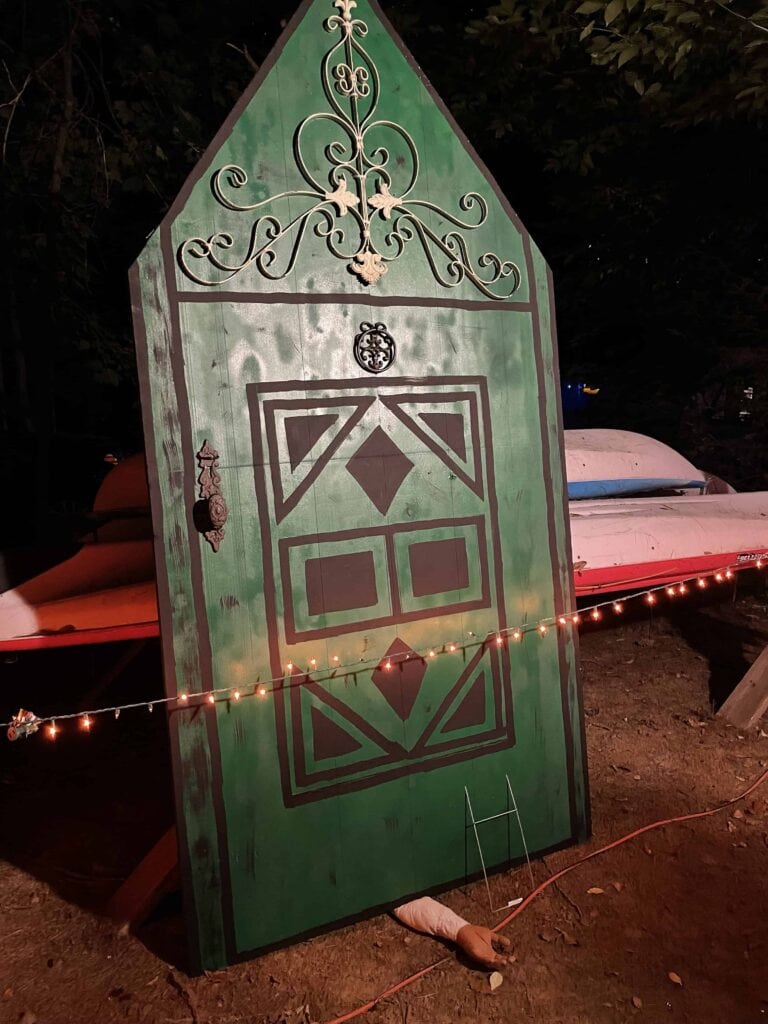
Next up is the hallway that has a bunch of scary doors that knock and breathe. They are spooky. I managed to design one with a metal scroll decoration that I added to the top of a painted piece of foam board. It ended up being 4′ x 8′ tall so it was towering over you and looked ominous.
I purchased the door knocker and the handle at Hobby Lobby.
Haunted mansion cemetary
We seem to do this cemetary scene with every scary Halloween theme we’ve done and just change it up a bit depending on the theme. This year I left the set up to my Daughter-in-law and grandkids and they did an amazing job. If I hadn’t hurt myself I would have made some new tombstones for it with the Haunted Mansion theme but I just didn’t have the strength to do it. So, if you are going to do a cemetery scene for the Disney Haunted Mansion theme, then you should definitely make some gravestones with the characters from the ride for sure! The gravestones were made with….foam board LOL

haunted mansion wall of portraits
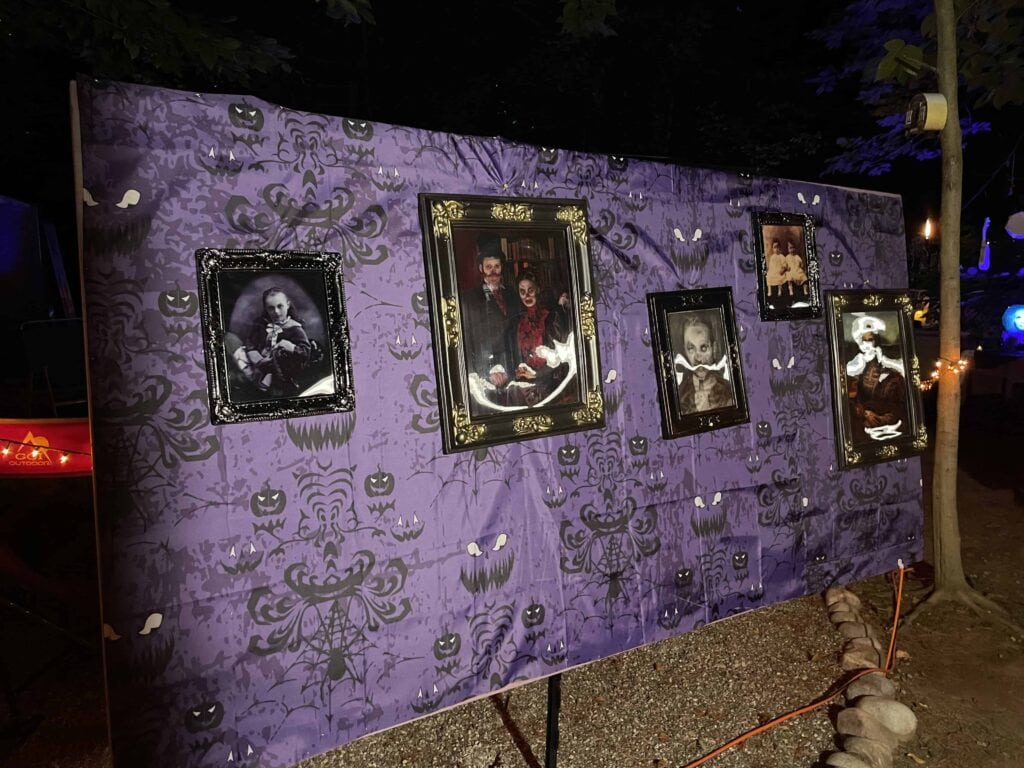
This prop ended up being really simple. I ordered a Disney Haunted Mansion shower curtain that was a replica of the wallpaper on the wall of portraits. I cut up the shower curtain to cover a 4 x 8 sheet of foam board. Between my Daughter-in-law and I, we had enough changing portraits in our Halloween stash. All we did was hang the portraits and shine a spotlight on them.
I think the shower curtain may have glowed with a black light, but I didn’t want to use a black light because you wouldn’t see the portraits. So, instead of having glowing eyes on the portrait wall, I had a bunch of glowing eyes that I hung in a tree in another section of the path.
haunted mansion madam leota
This was one of my favorite sections of the Haunted Mansion theme. I researched online for how to do a Madam Leota head and a lot of them used an image projection onto a form. But I do not have that much technical knowledge and it just seemed way too complicated.
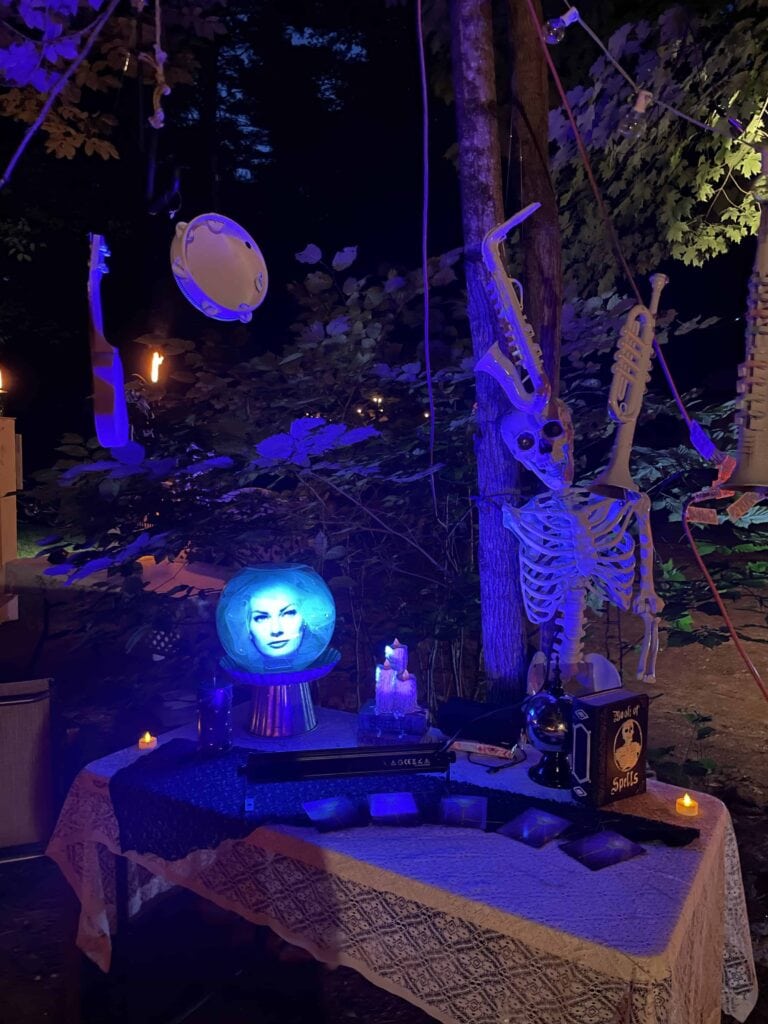
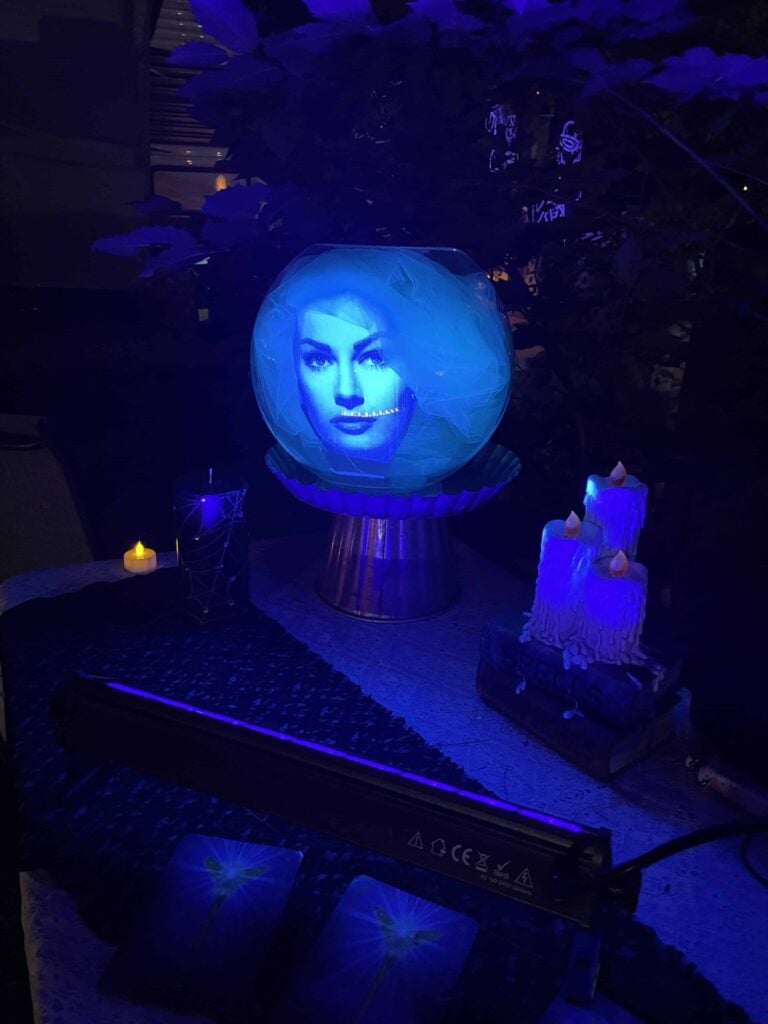
So instead, I found an image of an old-time actress, I can’t remember who it was, and I printed the image in black and white. I then enlarged it so it would fit inside the plastic globe. I attached the image onto a piece of cardboard so that it would stand up straight inside the globe. The hair was simply 2 yards of blue tulle and little strips of green tulle tucked around the face.
I set the globe on top of a cake stand and shined a black light onto it. It really looked like it was glowing! It was perfect!
Then I spray painted some plastic musical instruments that I ordered on Amazon and hung them from the tree above the table. The black light reached these as well but the white paint I used wasn’t really glowing. So next time I will use glow-in-the-dark paint instead of regular white spray paint. I read that not all white paint glows. It has something to do with a chemical in the paint or fabric that makes it glow. Keep this in mind.
The final touches were some tarot cards and other Halloween-type decorations on the table and I played a loop of Madam Leota seance that I found on Youtube to a speaker. It was amazing!
haunted mansion Constance attic scene
This part of the Disney Haunted Mansion Halloween decorations was a lot of fun to put together. Basically, it was all about recreating an attic scene with a Constance bride as the focal point.
In the attic, I used a bunch of stuff from my storage including, old chests, furniture, ladders, a folding screen, an old portrait of me from the 80’s glamor shots LOL, some wooden frames, an area rug from my dining room, and my Daughter-in-law brought a bunch of things from her storage as well. I think we successfully made it look like an attic.

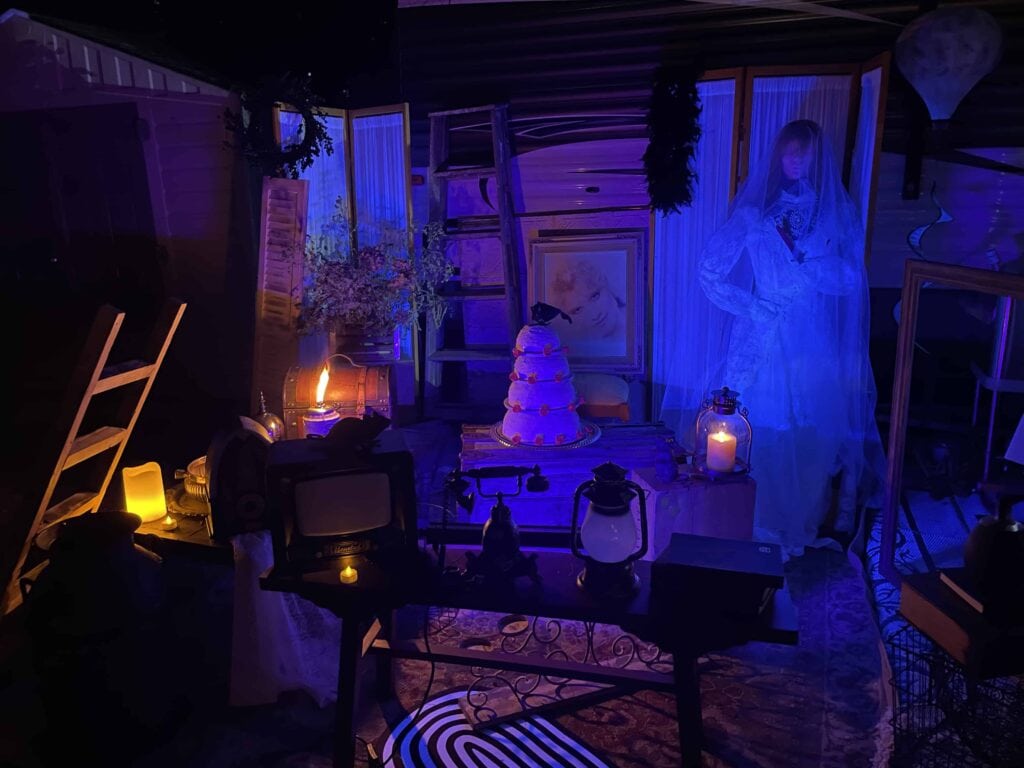
My 13-year-old granddaughter, who loves baking, made the wedding cake out of a set of 4 plastic bowls. She covered each bowl with spackle and decorated them with edible rosettes from the grocery store. I topped the cake with a black crow. I had my parent’s original wedding topper which would have been perfect with the yellowed look and the base was broken (it’s 50+ years old) but my grandaughter forbid me to use it for fear of something happening to it and she was right! But, it would have been soooo cool!
I made Constance out of my wedding dress and a dress stand that I had for a decoration in my closet room. I added a foam head to the dress stand and used a piece of white tulle for a veil. I posed her with a plastic knife and set an axe at her feet. For those of you who don’t know the story, Constance murdered many husbands. 🙂
The final touches were old books, lanterns, torches, a dead flower arrangement, and lots of little Halloween decorations like rats, an old tv that talks, an old phone that talks, and other misc stuff for effect. The only thing I forgot (I literally just thought of this) was spider webs. I usually have bags of the stuff that you stretch onto things but I didn’t see anything when I was going through my stash and forgot to get some! That’s on the list if I recreate this for actual Halloween.
The whole scene looked amazing under the blacklight…especially the wedding dress. I don’t know why but all of the photos with the black light looked really blue but in person, it just looked like it was glowing.
Haunted mansion dancing ghosts (well skeletons)
I wanted to recreate the dancing ghosts somehow but I couldn’t figure out how. But, I did have some Halloween DVDs that featured dancing skeletons that I decided would do the trick. The DVD is from AmosFX and you can get them here. They are made to use with a projector to project onto a wall, with your TV, or on props or screens to make your decorations come to life.
I purchased one of their screens to project the dancing skeletons onto it. I hung the screen from my awning and put the projector on the steps of the camper to shine out at the screen. This effect made the skeletons look like they were dancing in mid-air.
I don’t have an image of this but I will add a video of the entire walk thru at the end of this post and you can see the skeletons in the video.
haunted mansion hitchhiking ghosts
This was the first project that I worked on for this whole celebration. I projected some images that I found online onto 4′ pieces of foam board after painting them black. Then painted them with glow-in-the-dark paint. In hindsight, I wouldn’t paint the board first because it made it hard to see the projected image. Luckily, I can improvise and have just enough detail to start me off.

haunted mansion carriage / hearse
This prop almost didn’t happen because I just couldn’t even think about making such a big prop with how I was feeling. But, last minute my son and daughter-in-law came thru and came up with a great idea to make the whole thing wayyyy easier to build.
When I was figuring out the plan in my head, I saw some long metal pieces in their backyard that I thought would look really good as sides to the carriage and we were trying to figure out how to build a box around them to form the main part of the carriage. We thought about trying to find some electrical wire spools to use as wheels but couldn’t find any. And then we remembered that we needed a driver’s seat. Hmmm The whole thing seemed daunting and I actually crossed it off the list.
Then my son and daughter-in-law insisted that we build it because it would make a great focal point at the front of the campsite. So, when trying to figure out how to put it together, my son started to build it on top of an 8′ folding table and it hit me that the table could work really well as the base of the carriage!
So, we made the carriage 6′ long which left us a couple of feet where we could sit a skeleton in front of it as a driver.
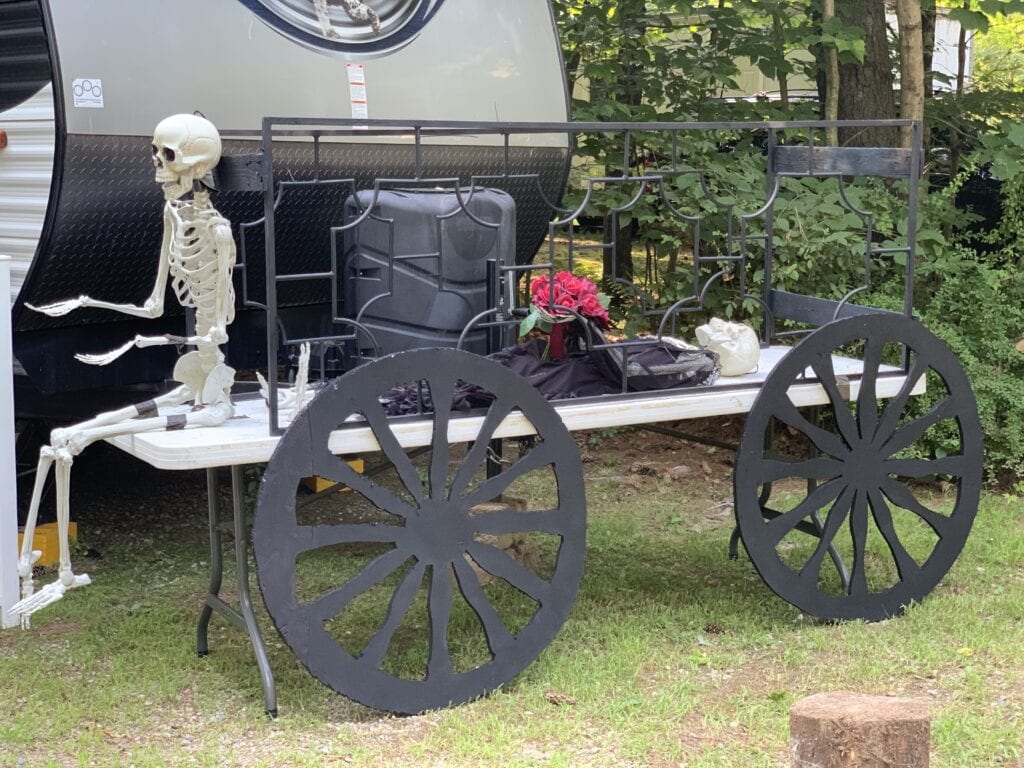
They made the wheels out of foam board by tracing a metal wheel that they had in their yard as a decoration. After failing at a few different attempts of cutting out the wheels, they finally ended up using a jigsaw, and that made the job much easier. We did have a piece that broke off, but a little black duct tape and you couldn’t even see it. Then we just duct-taped the wheels to the front of the table and tada…instant horse carriage.
If we had more time I would have added a top and back and front to the carriage, but I honestly think it looked great without it. Watch the entire video below and you will see the carriage at the end. It looked great at night with the spotlight on it.
Disney Haunted Mansion costumes
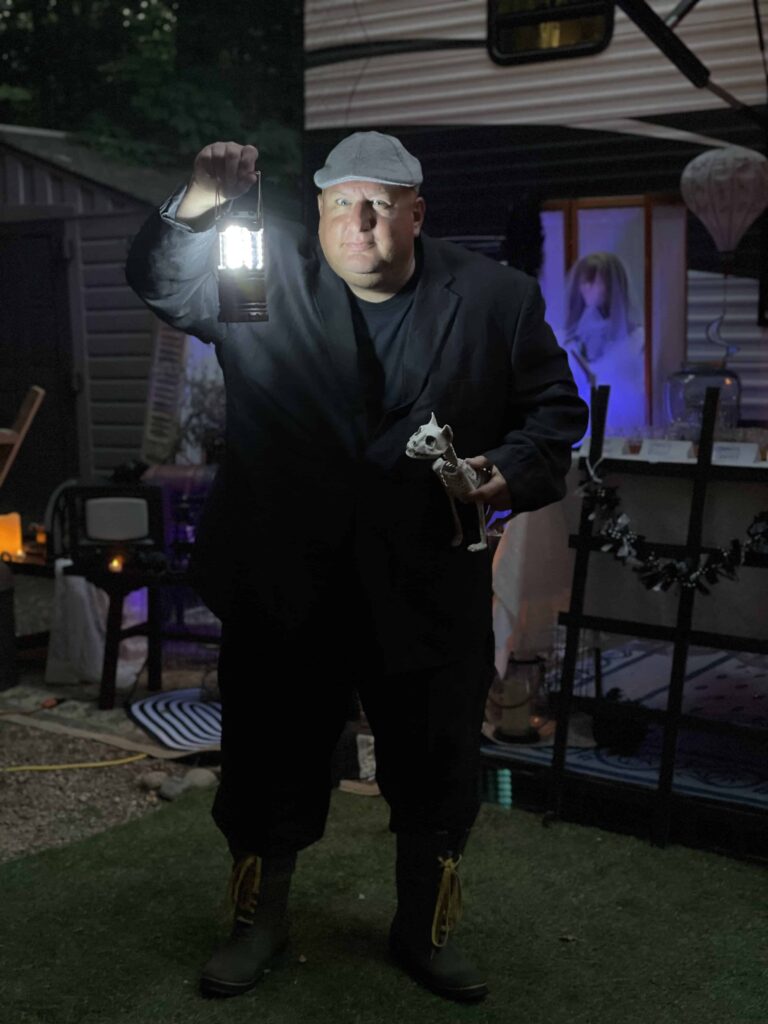
My husband and I decided to dress up as the Ghost Hosts. I had a mixture of purchased items and some thrift store finds and closet shopping.
My costume consisted of a green gown that I found for $5 at a thrift store. Funny story, It had a lace topper attached to the breast area. I cut the dress to remove the lace and arms and was left with a simple green sleeveless dress. Then, because it was a couple of sizes too small for me, I cut the dress right up the middle of the back and sewed in a piece of black stretchy material so I could just slip it on.
Then, I realized that I sewed the fabric to the right side of the dress, ugh! So, for the heck of it, I put the dress on inside out and liked it even better. The lining was a satin material and it just worked better. Then, I didn’t like how the front of the dress looked so I turned the whole dress backwards and liked that better too. LOL So, I wore my dress backward and inside out!!!
Then I purchased an authentic Haunted Mansion apron, socks, and a maids headband and it all came together.
My husband’s costume was a green coat I purchased online. Then I grabbed a shirt and black pants from the closet. And finished it off with a vest that I painted purple last year for another costume along with a ribbon barrette that we used as a tie.

My granddaughter wanted to be the tightrope walker in the stretching room so we got her a petticoat and she wore that with a tank top and made some ballet slippers out of her shoes and some ribbon. To top off her costume she borrowed an umbrella from my sister-in-law.

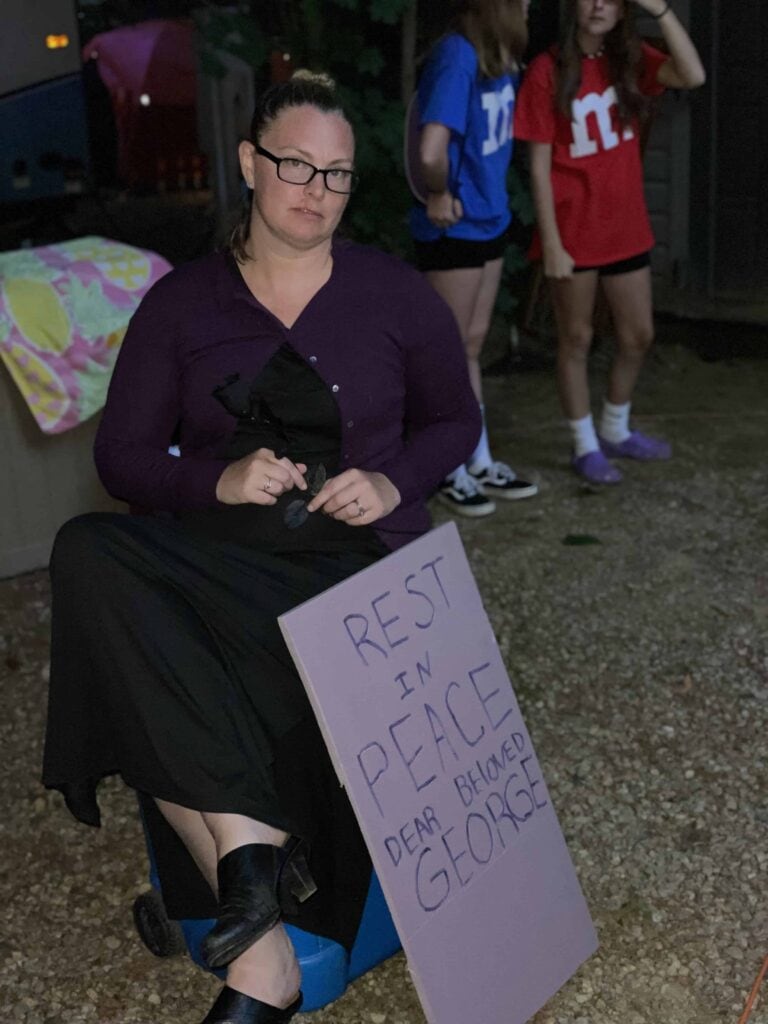
My brother and his wife dressed up as the graveyard keeper and Mary Gracey aka Constance Hatchaway. They put their costumes together all by themselves and looked amazing.
Disney’s Haunted Mansion Halloween Decorations video
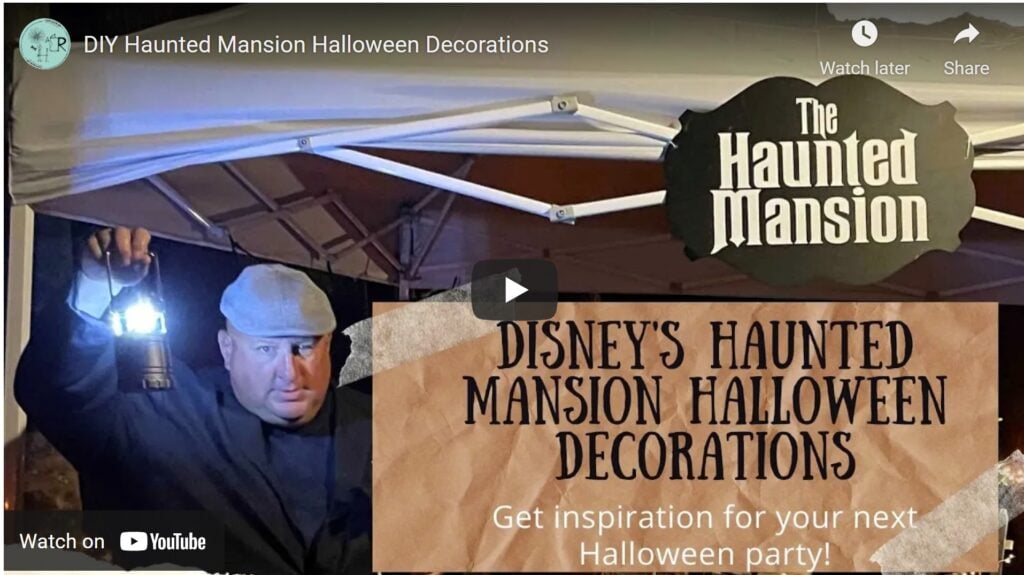
Well, that’s all of the Haunted Mansion Halloween decorations I made for this celebration. But what made it all come together was playing the Disney Haunted Mansion theme song in the background through the entire walk-through. You can find that music on a loop from YouTube here.
Related Posts…

I love the Haunted Mansion theme for the camping trip. We just started going to a place that does a Disney Halloween themed weekend. The set ups and costumes are so fun and people put a lot of work into them. I think I’m going to use a few of your ideas for our set up this year. Thank You for the inspiration!
I’m glad you liked it. Halloween at camp is our favorite weekend. And it happens to be this weekend for ours! This years theme is toy story. I’ll do a post in a couple weeks 😊. Have fun with yours!