
DIY Pirate Halloween Decorations: How We Built Our Pirate Ship & Outdoor Display
If you’re looking for DIY pirate Halloween decorations, a pirate theme is a fun and creative way to decorate for Halloween. This year, we transformed our campsite into a complete pirate-themed Halloween display with a handmade pirate ship, DIY props, and plenty of themed details that brought the whole scene to life. I’m sharing our pirate setup to inspire your own Halloween display, whether you’re decorating a campground or creating your own pirate-themed Halloween display at home.
In this article you’ll see:
- A DIY pirate ship
- Pirate jail and skeleton displays
- Handmade pirate props
- Pirate-themed campsite decorations
- Easy ideas you can recreate for your own Halloween display

This post may contain affiliate links. If you choose to purchase a recommended product, I may receive a small commission at no additional cost to you. Rest assured that I will not recommend any product that I would not use myself. For our full policies and disclosures click here.

Planning an entire Halloween camping weekend?
Explore my complete guide filled with campground decorating ideas, games, activities, and party inspiration. 13 Halloween Camping Ideas for a Fun Campground Party.
Creating the Pirate Trail
Our pirate-themed Halloween display followed a winding trail through the woods that led guests from one pirate scene to the next. We lined the path with orange Halloween lights and accented it with lanterns and strobe lights to create an eerie atmosphere. The glowing trail helped guide visitors through the pirate adventure while adding just the right amount of spooky fun.
DIY Pirate Ship Camper for Halloween
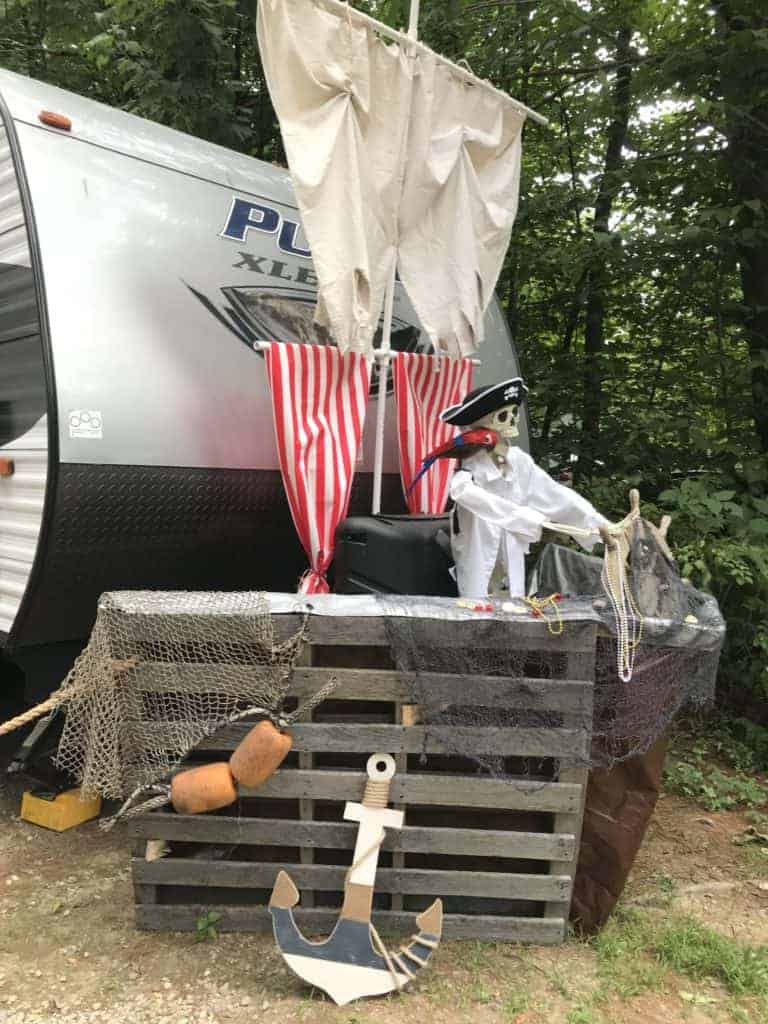

Every pirate Halloween display needs a ship, so we started by transforming our camper into a pirate ship. We built it almost entirely with inexpensive materials like pallets, PVC pipe, tarps, rope, and a few pirate decorations, making it a fun DIY project for our campsite.
We used two old pallets with a brown tarp stretched between them to create the bow of our pirate ship. Next, we draped pirate cloth and netting over the front and added treasures, an anchor, and a skeleton pirate complete with his trusty parrot. For the sail, we used a drop cloth, a red striped tablecloth, and PVC pipe.
To finish the scene, we gathered logs from the campground owner and tied them together with rope to create the dock posts. And after dark we used a strobe light and a fog machine to give the whole thing an eerie effect.
This simple DIY project became the centerpiece of our entire pirate Halloween display.
DIY Pirate Walk-the-Plank Halloween Display
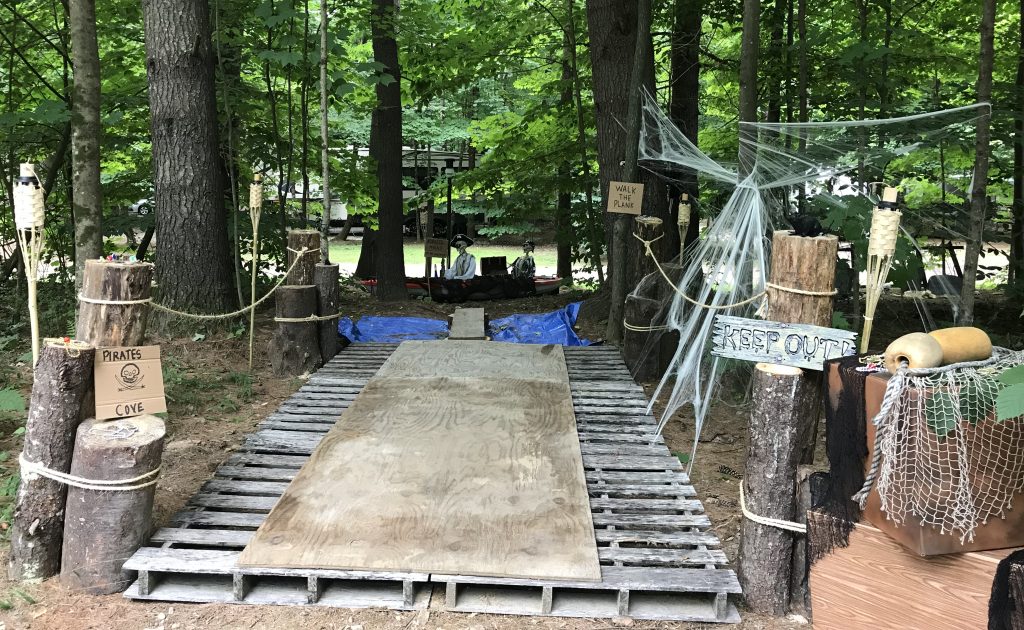
Our pirate-themed Halloween display led guests down a wooded path that we transformed into a pirate ship dock that lead to a long board on top of a blue tarp. This became our version of the classic “walk the plank” experience and was one of the most interactive parts of our campsite Halloween setup.
To create the look, we built a pier-like walkway that led visitors toward the path . We had originally planned to add shark fins in the “water” below the plank, but in all the excitement of decorating, I completely forgot to put them out! (A special thank you to Lauren for painting the shark fins—they looked amazing!)
For safety, the campground asked us to place a sheet of plywood over part of the deck. It wasn’t quite the look we had envisioned, but it made the walkway much safer for everyone. Even with that change, we were really happy with how the pirate walk-the-plank display turned out.
Pirate Treasure Kayak Escape
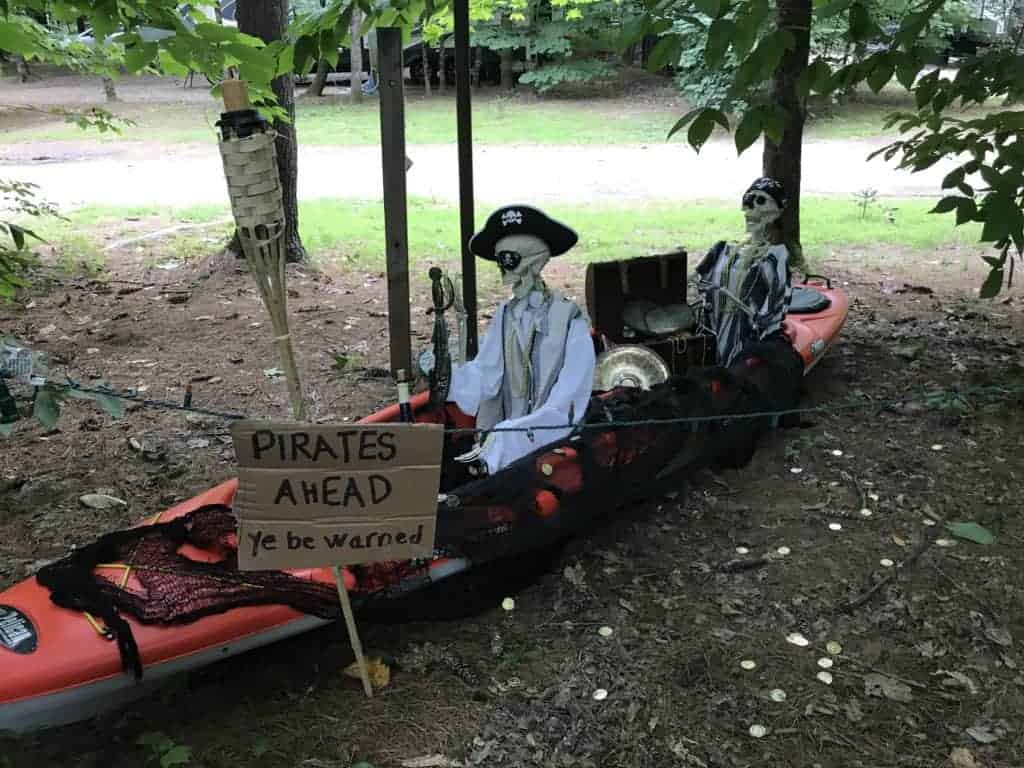
As guests continued down the trail, they came across a pair of pirates making their getaway with a chest full of treasure.
We turned one of our kayaks into a pirate boat, giving the impression that the pirates were escaping with their loot after a successful raid. It was a fun way to use something we already had and added another scene to our pirate Halloween display.
DIY Pirate Graveyard
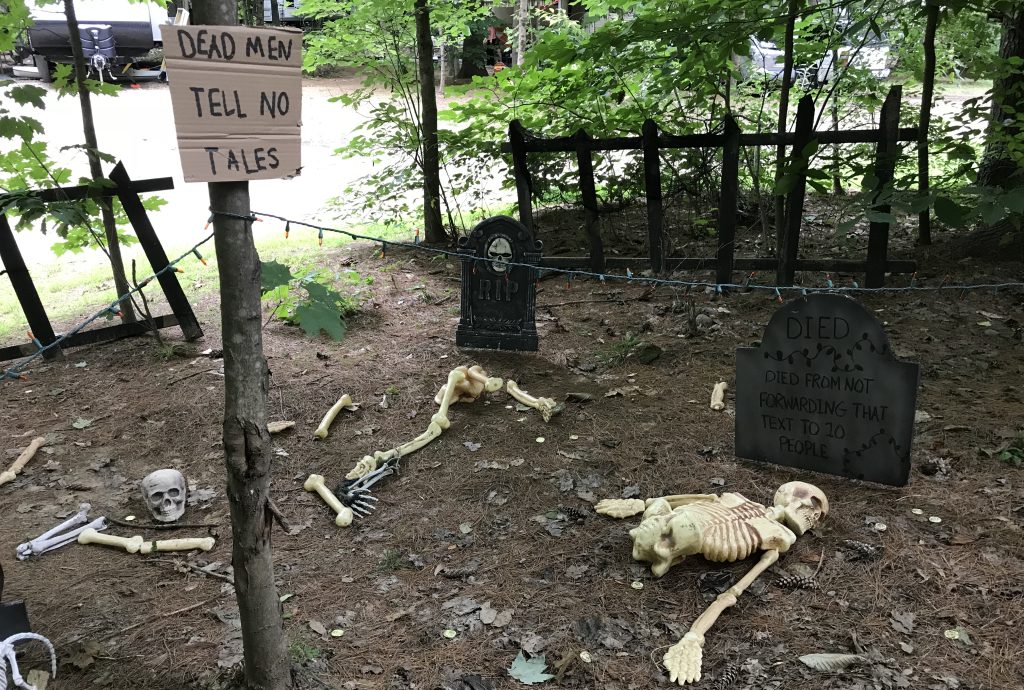
Just around the corner, guests came upon our pirate graveyard, complete with a warning sign to let them know they were entering dangerous waters. We mixed a few inexpensive store-bought graveyard decorations with DIY elements to create the spooky scene.
To make the fence, we took apart an old pallet and attached the boards to two 1×3 supports before painting everything black. It was an easy, budget-friendly project that gave the graveyard a weathered pirate look without spending much money.
And speaking of not spending a lot of money…My granddaughter Addison made the “Dead men tell no tales” sign with cardboard and a sharpie.
DIY Pirate Jail Cell Scene
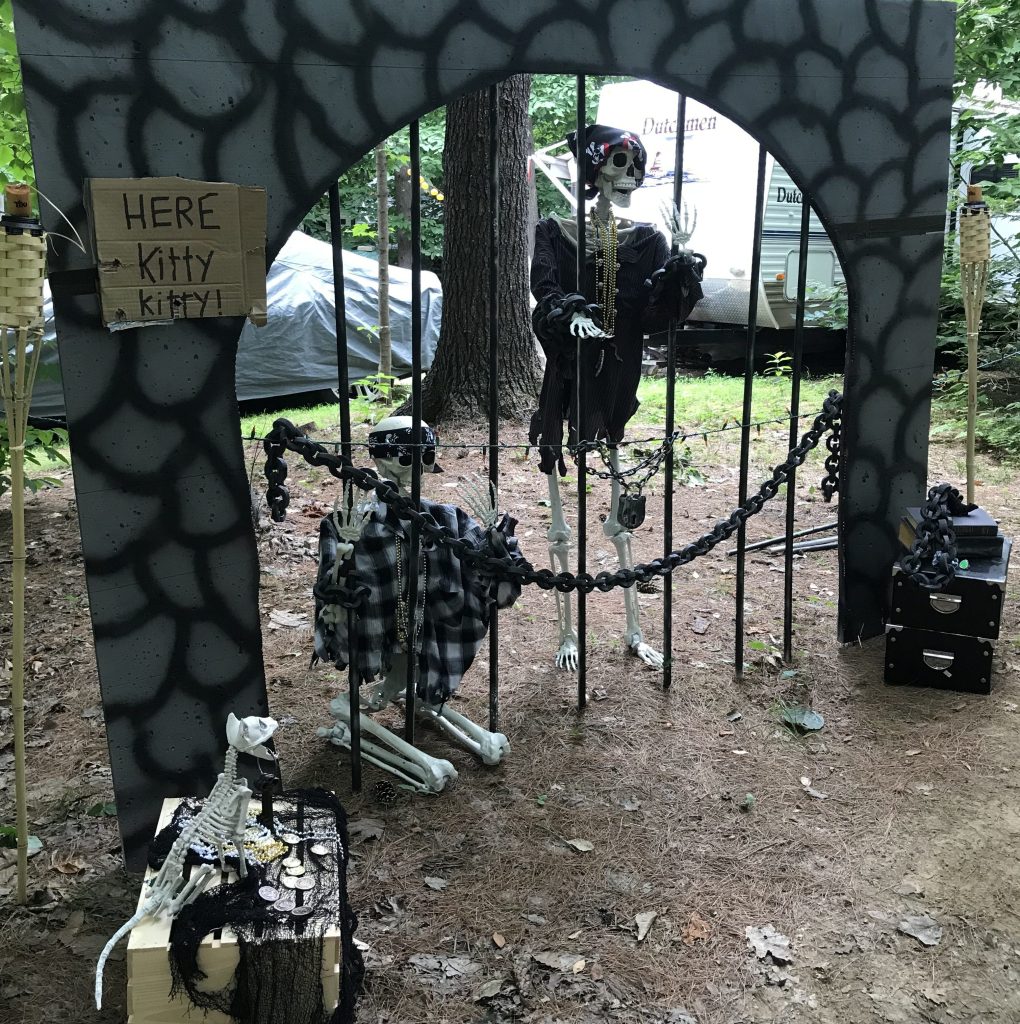
One of our favorite scenes was inspired by the Pirates of the Caribbean ride at Disney World. We created our own version of the famous pirate jail cell using materials we already had on hand.
To build the jail, we cut and painted pink insulation foam boards to create the stone walls and attached painted PVC pipe to the back to form the jail bars.
I’ve also used insulation board to create raised levels and landscaping for my DIY Halloween village display.
Once the skeleton pirates were inside, the skeleton kitty and sign, and a few treasure boxes, the scene instantly reminded everyone of the classic Disney attraction and became one of our favorite pirate Halloween decorations.
Pirate Captives in Hanging Cages


DIY hanging pirate prisoner cages made from inexpensive plastic laundry baskets and small skeletons.
No pirate adventure would be complete without a few captured prisoners! We created our hanging cages using two inexpensive plastic laundry baskets. After spray painting them black, we placed small skeletons inside and secured the baskets together with zip ties.
It was a simple, inexpensive DIY project that added another fun and slightly spooky scene to our pirate Halloween display.
Pirate Loot Bags & Collecting for a Cause
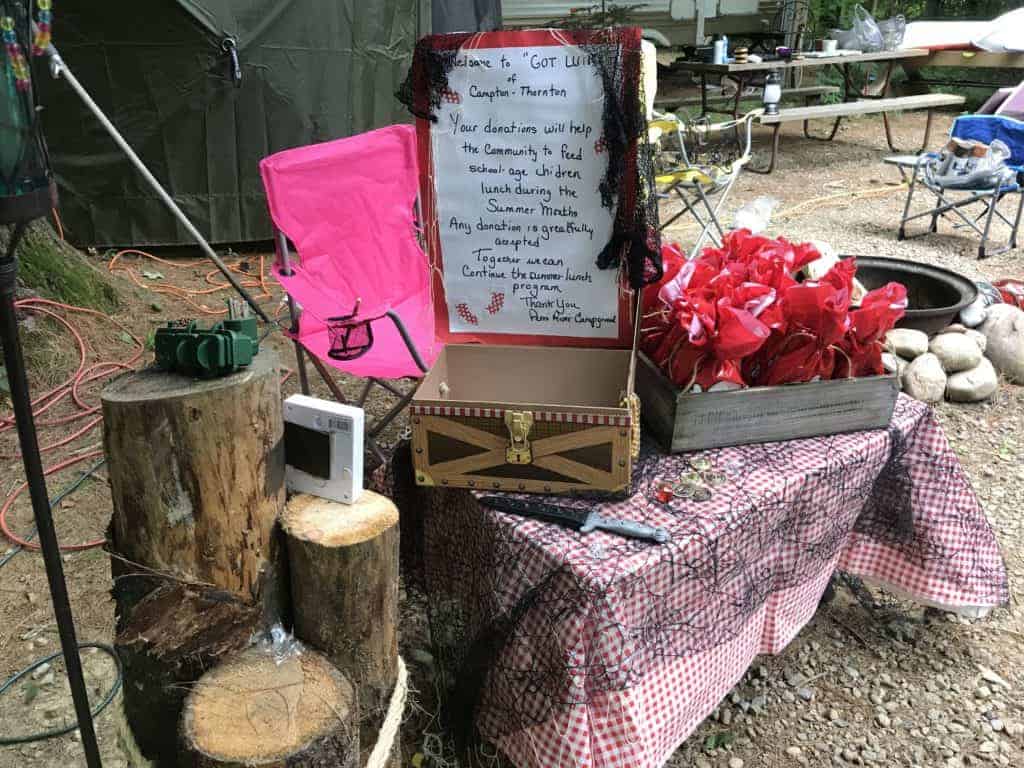
As guests reached the end of the trail, they stopped by our pirate loot table to pick up Halloween candy before continuing on to the rest of the campsite.
We also set up a donation table to collect money for a local cause, giving visitors a chance to support the community while enjoying our pirate Halloween display.
Pirate Bar, Campsite & Movie Night
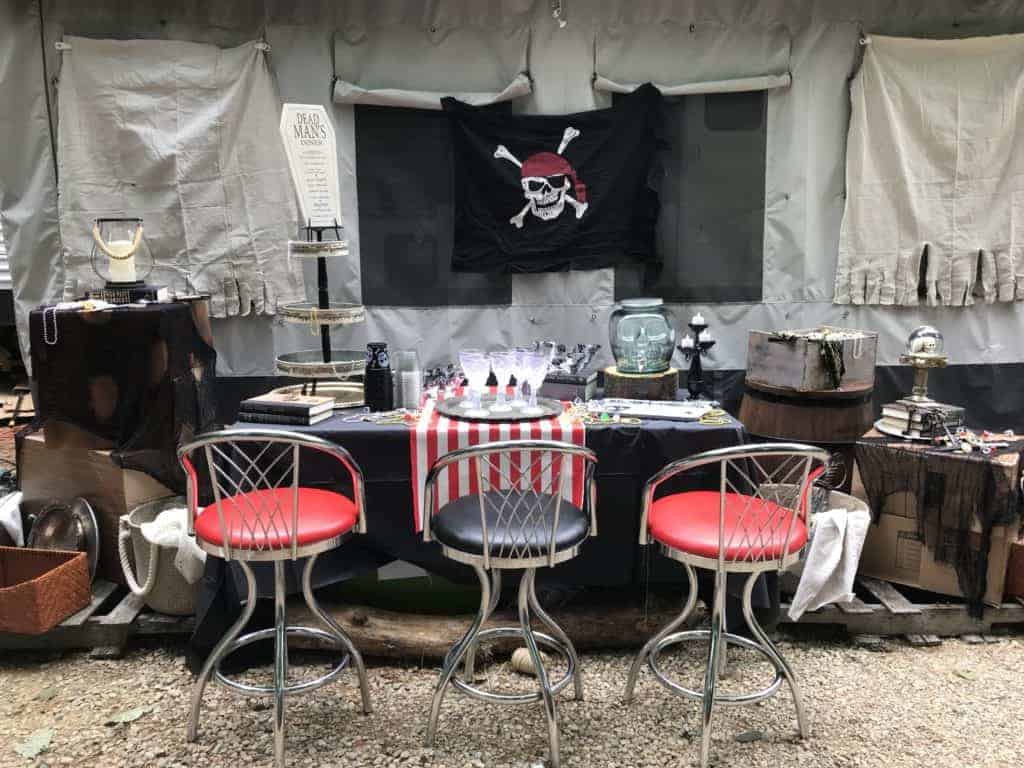
Back at the campsite, we finished the experience by decorating our camper and outdoor living area with even more pirate-themed details. A pirate bar serving “Pirate Punch,” to our trick-or-treaters, treasure chests, lots of loot, and other themed decorations helped tie everything together.
To end the night, we projected Pirates of the Caribbean onto a sheet hanging from our screen porch. The kids lined up their chairs in front of the campsite to enjoy the movie, making it the perfect ending to our pirate-themed Halloween celebration.

Creating our pirate-themed Halloween display was a lot of work, but it was worth every minute. I loved spending time with my family building each scene, and seeing the smiles on all the kids’ faces as they walked through the pirate trail made all the hard work worthwhile.
One of my favorite memories was meeting so many of our fellow seasonal campers while relaxing around the campfire with a cup of Pirate Punch.
The best part? When Halloween camping was over, we packed up the entire display and brought it home to decorate our front yard for “real” Halloween, giving us even more opportunities to enjoy everything we had built.
A special thank you to my husband, Dale, who always embraces my crazy, expensive, and exhausting ideas, and to my granddaughter, Addison, who is my right-hand helper through every project. I couldn’t have done it without you both. ❤️
Tips for Creating Your Own DIY Pirate Halloween Display
If you’re thinking about creating your own pirate-themed Halloween display, here are a few things we learned along the way:
- Start with one centerpiece, like a pirate ship, and build the rest of your display around it.
- Repurpose materials you already have, such as pallets, PVC pipe, tarps, laundry baskets, and rope.
- Mix DIY projects with a few inexpensive store-bought decorations to save time and money.
- Use lighting, lanterns, and strobe lights to create a spooky atmosphere after dark.
- Tell a story by creating different pirate scenes that guests can discover as they walk through your display.
- Most importantly, have fun and let family and friends help. Building the display together became one of our favorite Halloween memories.
FAQs
If you’re building larger DIY projects like a pirate ship or themed props, start several months before Halloween. If I had the space to store large items I would start shortly after I finish the current event. Smaller decorations and lighting can be added closer to the event but always plan everything first.
Pallets, PVC pipe, tarps, rope, drop cloths, laundry baskets, insulation foam (not cheap but can be reused), cardboard, and thrift store treasures are all great budget-friendly materials for creating pirate-themed Halloween props.
Layering! Layer different textures like rope, netting, weathered wood, lanterns, treasure chests, skeletons, and dramatic lighting. Creating several themed scenes instead of one large display also makes the experience feel more immersive.
Absolutely! Most of the displays in this article can be adapted for a front yard, driveway, or backyard. In fact, after Halloween camping ended, we brought many of our decorations home to use for Halloween at our house.
Yes! Many of the pirate decorations in this display can easily be scaled down for a trunk-or-treat. I would place the pirate ship hull on the ground behind the vehicle, with the skeleton pirate sitting in the open trunk. Then add a treasure chest, rope, netting, and a few pirate-themed decorations to create a fun pirate display without needing a full campsite or front yard.
Have you ever created a themed Halloween display? I’d love to hear about it in the comments—or tell me which theme you’d like to try next!
More DIY Halloween Theme Ideas…


Want to see more from Our Repurposed Home?
Just add me as a Preferred Source on Google and you may see more of my ideas when you search.
 Add Me on Google
When Google opens, just check the box next to Our Repurposed Home.
Hi! This is incredible. It’s been a few years, so I hope you see this, but I’m wondering how you made the steering wheel. Thanks!
The steering wheel was purchased but I don’t remember from where, sorry.
This was so fantastic to find! We took your ideas as inspiration and decorated our site this past weekend and one the site decorating contest! Thanks for posting your pics.
I’d love to see some pictures!
Cecilia, CONGRATULATIONS!!! That is so great! I’m glad my ideas helped you with some inspiration.
Wow!! What a great idea and I bet the kids just loved it. Great job!
Thanks Mary. All of us go to camp on Halloween weekend (Dale and I, Kids, and grand-kids) and we all work together to pull this off. It’s a wonderful bonding experience that we all enjoy and look forward to each year.