How to Build a PVC Catio (DIY Cat Enclosure Plans)
If your indoor cats are craving the sights, smells, and sounds of the outside world, a PVC catio is the perfect safe-space solution. This easy DIY project plan is budget-friendly, totally customizable, and provides your feline friends with plenty of fresh air and sunshine — without the risks associated with free roaming.
I will show you exactly how to build a catio with PVC pipes in this step-by-step plan, and your cats will love you for it!

Ready to Skip the Guesswork?
Grab the complete printable DIY PVC Catio Building Guide.
Includes materials list, cut measurements, layout guide, and step-by-step instructions — all in one easy download.
But first, a little backstory.
A couple of years ago, I built a wooden cat enclosure (a catio) for my indoor cats. It worked great at first… until a few winters of being stored outside took their toll. The wood started to rot, mold crept in, and I realized it wasn’t going to last.
I had avoided sealing it because I worried the cats might chew on treated wood. So I left it natural — and time won that battle.
When I looked at replacing it, I found custom PVC catios selling for thousands of dollars. That wasn’t happening. So instead of buying one, I decided to design and build a better version myself — using PVC.
The total cost? Around $300.
And honestly? It turned out even better than the original.
Project at a Glance
- Finished size: 74″ long × 55″ wide × 90″ tall
- Original project cost: Approximately $300
- Estimated build time: 4–6 hours for the basic structure
- Skill level: Beginner to intermediate
- Primary material: 1-inch PVC pipe
- Best for: Decks, patios, and protected outdoor spaces
Here is what you’ll find in this post…
This post may contain affiliate links. If you choose to purchase a recommended product, I may receive a small commission at no additional cost to you. Rest assured that I will not recommend any product that I would not use myself. For our full policies and disclosures click here.
What is a Catio?
A catio is a structure built to allow your cats to have some outdoor time in a safe place. Also known as an outdoor cat enclosure, outdoor cat shelter, or cat run, a catio gives your kitty a safe way to enjoy fresh air and sunshine without the risks of roaming freely outdoors.
Therefore, catios are purrfect for indoor cats. Do you see what I did there? LOL
Catios, or outdoor cat enclosures, can be made in many different configurations, materials, and sizes. If you’re building your own, you’re only limited to space available, your budget, and your imagination. If you’re short on space and want something you can move around easily, you might prefer a portable PVC catio design instead of a permanent structure.
Why build a catio out of PVC?
There are a few different materials you could build your outdoor cat enclosure with, but in my opinion, PVC is the most versatile and easiest to work with. If you want to build an easy DIY cat enclosure, PVC is your best friend (next to your cat of course) 🙂
As I said above, building a cat enclosure out of PVC will allow you to keep it outdoors without fear of it rotting and falling apart. Unlike untreated wood, PVC won’t rot and is lightweight and weather-resistant, making it a practical material for outdoor use.
PVC is also very lightweight and will allow you to move the entire enclosure to another area if you wish. Or if you want to store it during the winter, you can easily take it apart to store it.
My original PVC catio was made with PVC pipes and plastic garden fencing. Plastic fencing is lightweight and easy to attach, but it is not predator-proof, so choose stronger galvanized welded wire or hardware cloth if wildlife or loose dogs could reach your enclosure.
For those concerned with the effects of PVC, here are a couple of articles with both the pros and cons of using PVC products. Is PVC Safe? The Vinyl Debate
DIY PVC Catio Supply List + Printable Plans
I included a complete materials list in my printable DIY PVC Catio Building Guide, along with the cut measurements, layout, and step-by-step instructions. Your measurements could be slightly different depending on the size and configuration of your cage. But, if you decide to build yours to my exact specifications, this would be your supply list.
Which Catio Guide Is Right for You?
DIY PVC Catio Building Guide
Build Lori’s exact PVC catio with a complete supply list, cut measurements, layout guide, and step-by-step instructions.

Catio Planning & Sizing Workbook
Plan a custom-sized catio for any space or material with measuring guidance, location tips, layout pages, and materials planning.
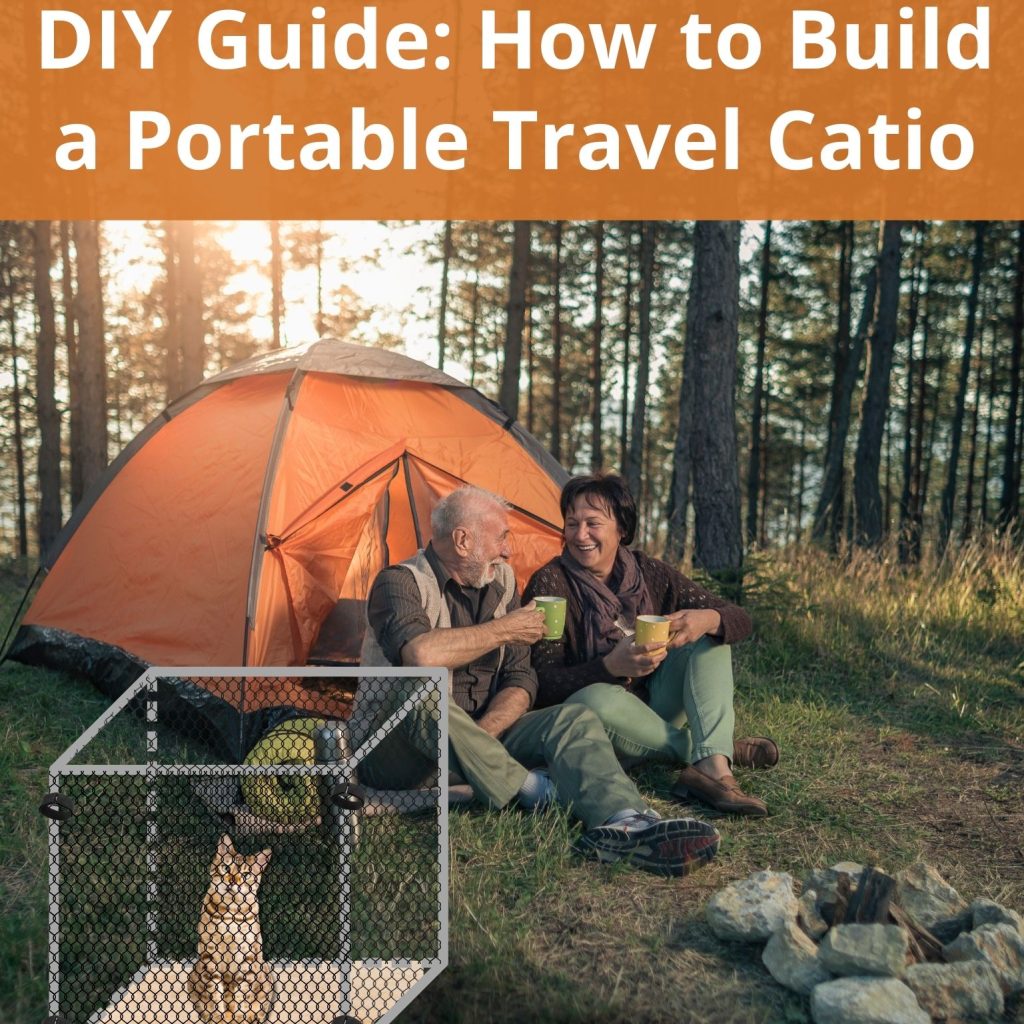
DIY Portable PVC Catio Guide
Build a lightweight, collapsible PVC catio for renters, camping, or travel with illustrated step-by-step instructions.
Updates:
1. Fencing update: When I originally built this catio, I used plastic garden fencing because it was lightweight and easy to attach to the PVC frame. After readers raised concerns about other animals getting through it, I upgraded to stronger wire fencing. Plastic fencing may work in a protected area with supervision, but it should not be considered predator-proof. If wildlife or loose dogs can reach your catio, choose sturdy galvanized welded wire or hardware cloth and make sure all sharp cut edges face away from your cats.
2. I have since found a better way to attach the gate to the patio. Check out these PVC hinges updated in the supply list.
3. I also had a reader share her Catio with me and she found these pretty interesting products. You may want to check these out. Thanks Linda 🙂
12″ Hook and Loop Cable straps
12″ Poly Webbing Strap and Buckles
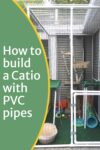
How to build your catio frame out of PVC Pipes
I built the catio so that my cats can climb out of the living room window directly into the enclosure. But you can build an enclosed, free-standing cage that you could put anywhere. One of the benefits of a PVC enclosure is that it’s very light, so you can move it easily.
First, I decided on the overall size of the cage. This was easy because I already knew exactly where I wanted it to go (on my deck, where the other cage was). So I built it to those exact measurements. My catio’s finished measurements were 74″ long x 55″ wide by 90″ tall.
Design and sketch out your plan
The first thing you need to do is to determine what your catio will look like. I decided on making a basic 4-sided frame with a door on one end and a window on one side so they could have access from the house through a window.
Sketch out each of your 4 walls with measurements and any structures you want to add. This way, you can see exactly what cuts you will need to make, how many, and what kind of connectors you will need. I added 2 perches for my cats, so I needed to make sure to add 3-way connectors on my cross pieces. Read more about this below.
Once your structure is built, don’t forget to make it cozy and functional with smart catio decorating ideas.
Start building your frame from the floor up
To begin building, you will need to lay out your outer frame, starting with the floor and working up. My overall measurements were 74″L X 55″W X 90″H. Make sure you have a little wiggle room because the final outside measurement will depend on your cuts and connectors.
Begin with your first wall. To measure out your cuts of the PVC pipe for each wall, you’re going to take your full-length measurement and subtract 1″ for each place you will connect to a fitting.
For example, my first wall was the wall with a door. Because I needed to frame out my door opening, I added a middle upright to the wall. See the image below. It measured 55″ wide total but had (2) 3-way fittings for the corners and (1) center tee fitting that connected two pieces of PVC on each side. So I needed to subtract 1″ X 4. (1″ for each end piece I’m connecting to and 2″ for the center fitting because it connects there in two spots.) This is an approximate formula that worked for me.

Start cutting your pieces and add connectors
Figure out your new length and cut a piece of PVC pipe to this length. Now, cut this piece into two sections. If you have more than 2 sections, you will cut your pipe into however many sections you have—3 sections into 3 pieces, 4 into 4 pieces, etc.
You will need a ratcheting PVC cutter or a saw to cut your PVC. Here are some from Amazon, or you can get them at Home Depot.
Now you need to add your connectors. You will need a 3-way connector for each of the ends to make a corner. Now you can connect your walls both vertically and horizontally.
You will also need a 3-way Tee connector to connect your wall sections in the middle for added support if your wall is long. Or add them if you are adding uprights for doors, windows, etc. I added middle connectors because I am adding horizontal cross pieces in the middle of two walls to connect perches for the cats. I want to add support to hold it. Now you can connect your PVC pipes to form your wall base frame.


Begin adding the walls to the catio
Once you have connected your base frame, you can start adding the uprights. First, determine the height of your frame and subtract any end connectors (top and bottom) and any middle crosspieces, just as with the base.
For example, for my walls where I am adding the horizontal cross pieces, I will need to subtract 1″ X 4 again, 1″ each for the top and bottom fittings, and 2″ for the center cross fitting. If you are adding a door or windows, you will need to keep the framing in mind so you will know how many cuts to make and the sizes.
Note: If you are going to add a solid roof, then remember to make one wall slightly taller to allow rain to run off. Read more about this below.
Because of my perches and door, most of my uprights will be cut in half. See the image below. The right, left, and front sections need to be cut in two so you can add the horizontal cross pieces. The only upright that was the full length for me was the center in the back section. This is because I didn’t have any cross-pieces in the back. Center back upright, not in the photo. Also, I changed out the wall connector on the front center section on the right to a 4-way elbow so I could frame the door. Read more about this under framing a door or window.

Framing a door or window in your catio
If you are building a door or window, you will need to add more PVC pipes and connectors to the walls to frame them. See the image below for a visual example of a door

DIY Catio Plans (Printable PVC Cat Enclosure PDF)
These DIY catio plans include the full materials list, cut measurements, and layout guide so you can build with confidence.

PDF. Available for $14.99.
In order for me to build the front wall with the door, I needed to change the upright walls a little. On the right side, middle of the front wall, I needed to add a 4-way connector, making this upright into two sections. This is so I could add a cross piece in two directions (one for the top of the door and one for the right side support in front of the window. I also added a Tee connector in the center upright, making it into two pieces as well.
My door opening ended up being 35″ tall by 25″ wide, so I made my door 34″ tall by 24″ wide. This left 1/2 inch around the door.
You will then attach the door to the catio with PVC hinges and 2 – 3 1/2″ zinc swivel hasps.
Note: In the picture above, it is just temporarily zip-tied, so it looks like it has more space than that.
Building a door
Building the actual door is the easiest part. You will just connect your PVC pieces using 90-degree elbows. Just measure the door opening, leaving 1/2 inch to an inch around each side. Then do the math of subtracting 1″ for each connection, just like with the walls. My example: Opening = 34″ minus 2″ for elbows, and 24″ minus 2″ for elbows. This = 22″ PVC pipes for the top and bottom, and 32″ PVC pipes for the sides.
How to make a window
If you were going to add a window, then you would need two horizontal cross-sections and two vertical cross-sections. I didn’t frame the window I made next to the house. I just cut a section of the netting out and had the bottom cross-section, which I used for a perch. This isn’t how I would have you do it. I didn’t need support around the whole window for my design because it was up against the house.
Note: I couldn’t find an image of a finished window. You would build it the same way as a door, just in a smaller size and in the middle of the wall instead of at the bottom.
Attaching the netting to your catio
Once you have all four walls constructed and connected, you can begin to attach the fencing. I purchased a roll of Blue Hawk Plastic Blanket garden fencing that was 4′ wide. This product was so easy to cut and install because it is made of plastic instead of metal. I hung the fencing from top to bottom, connecting each piece with 8″ long zip ties. I did this along each PVC pipe section from the inside.

Making sure your cats are secure
For the cats, I attached a zip tie every 6″ or so just so they couldn’t squeeze through any opening. I used clear ties so you wouldn’t see them from the outside of the catio.
Note: Make sure when you are installing the fencing that you are cutting the zip ties short and turning them away from the inside of the catio. This is so your cats can’t get cut on them. Also, make sure when you cut your fencing to size that you trim off any pointy ends for the same reason. See image below
When moving on to the next section, I overlapped the previous section a few inches. I did this just to add a little more stability and security to the fencing. Then I also attached the new section to the posts with the clear 8″ ties, and attached the fencing to itself with 4″ black ties to make double sure the cats wouldn’t sneak through any openings

Move around the entire enclosure, adding fencing with 8″ ties to every PVC frame, both horizontal and vertical, including window and door pieces. Once you finish adding all of the fencing, you can cut any openings you need to for your door and windows. Again, make sure to trim off any pointy edges exposed.
Important safety note: Choose your fencing based on where the catio will be used and what animals could reach it. Plastic garden fencing is lightweight and easy to attach, but it is not predator-proof. If wildlife or loose dogs could reach your catio, use sturdy galvanized welded wire or hardware cloth rather than chicken wire or plastic fencing. Secure every edge, eliminate gaps, and trim or cover sharp wire ends so they face away from your cats. Heavier fencing may also require additional frame support or anchoring.
How to add a roof to your Catio
Now you could add fencing to the top if you wish, connecting it the same way as the walls. I decided to add a plastic roof to mine so the cats could still enjoy being outside, even if it was raining.
I purchased 26″ x 6′ Corrugated Polycarbonate Plastic Roof Panels to make my roof. This is a thin, clear, corrugated material. It was perfect to keep out the rain and to let the sunshine through. My enclosure is in a corner next to my house, so it doesn’t ever get direct sun, so I don’t have to worry about the cats getting too hot. However, they do sell colored and tinted panels if you want to provide shade for them.
To install them, I measured my outer frame and added a little extra for overhang, and cut them to that length. Then I connected 3 panels, overlapping slightly to make my width. I connected them by drilling 2 small holes close together where they overlapped, then secured them together with the 8″ zip ties. I did this about 4 times across each overlapped section.
Finally, I attached the whole thing to the top of the catio frame by drilling holes near the edges and also using zip ties to secure it.
Make sure you leave a slight pitch if you’re going to use a roof, so any rain will drain off. These panels are not very rugged, and if rain collects on them, they will sag. I am also planning on adding a cross piece of wood or a plastic decking board to the top of the catio just to help support the middle of the roof in case of heavy rain. You could also switch out your top/middle connectors with a 4-way connector and add a pipe across the middle of the roof for added support.
Or you can add the pitch simply by having one wall slightly higher than the others. You don’t necessarily need to cut one wall higher, though. Just hammer down all the other sides so the PVC pipes are sitting into the fittings a little bit tighter. This should be all you need for the water to run off.

Building the perches inside your Catio
Now it’s time for the fun part…adding some structures for your cat to relax and play on.
I decided that I wanted two perches for them to lounge on. I added one in front of the window (also as a landing for when they come into the enclosure). The other one was on the opposite wall, so they could look down over the deck.
To make these, I had already installed 3-way connectors where my cross pieces were. Now I just had to add some small pieces of PVC pipe and two more 3-ways to connect them. This allowed me to give the perch legs for stability. I made my perches 14″ x 14″ near the window and 36″ x 12″ along the deck.
Next, I used some Green Indoor/Outdoor Area Rug pieces and attached them to the perch frames using zip ties. This gave them a soft place to relax. You can use any type of sturdy fabric you want to make them as long as it can be out in the weather.

Add finishing touches to your Catio
Finally, I finished the project by adding green indoor/outdoor rug material to the floor of the catio.. It’s not quite grass, but it gives it the look of grass. Or you can use any type of outdoor rug to give your catio some personality.
Then it was time to decorate and bring in the toys. I had already made a cat tree out of a purchased stand, some pieces of a birch tree, and a basket. So, I put it in the catio and it fit perfectly. Now they have something to climb on.
Then I added a ball that I hung from one of the perches and a few store-bought playthings for them to explore. I think they love it!

FAQs
PVC pipe can be a practical material for a catio when it is properly assembled and maintained. Cap or smooth any exposed pipe ends, secure all connections, and regularly inspect the frame for loose fittings, cracks, or weather damage. Choose fencing appropriate for your location, keep sharp edges and zip-tie ends away from your cats, and anchor the enclosure if it could shift or be affected by wind.
Most small to medium PVC catios cost between $150–$300 in materials, depending on size and features. Larger builds or extra upgrades (like tunnels or shelves) can increase the cost.
Absolutely! PVC is lightweight and easy to disassemble, making it perfect for a portable catio. You can design it in panels or sections so it can be moved around your yard or stored during the winter. Just make sure all connections are secure when it’s set up.
Catios can be any size—from a small window box that lets your cat enjoy the breeze to an entire enclosed room or large outdoor structure. The “best” size really depends on your cat’s personality, how many cats you have, your available space, and your budget. Whether it’s big or small, the key is making sure your feline friend has enough room to relax, climb, and explore safely.
If wildlife or loose dogs could reach your catio, use sturdy galvanized welded wire or hardware cloth rather than plastic garden fencing or chicken wire. Attach the fencing securely to the entire frame and check carefully for gaps around the roof, floor, doors, and entry points. Cover or turn all sharp cut edges away from your cats, anchor the catio when necessary, and inspect it regularly for damage or loose connections.
Because PVC is lightweight, a catio should be anchored if it could shift, tip, or be affected by wind. The best anchoring method will depend on whether the enclosure sits on a deck, patio, or ground. Secure it to a stable surface or structure using hardware appropriate for that location, and check the anchors and PVC connections regularly.
Not necessarily. Leaving the PVC connections unglued makes it easier to adjust, move, or disassemble the catio for storage. However, every fitting must be fully seated and checked regularly because unglued connections can loosen. If you want a permanent structure, PVC cement can create stronger connections, but the catio will no longer come apart easily. Consider your location, wind exposure, and storage plans before deciding.
If you have all your materials ready, a basic PVC catio can be assembled in 4–6 hours. Adding shelves, ramps, or other features may take an extra day.
A PVC catio may remain outside year-round depending on your climate, anchoring, fencing, and roof design. However, long-term exposure to sunlight and extreme temperatures can weaken materials over time. Inspect the frame, fencing, roof, fasteners, and anchors regularly, and never allow heavy snow or standing water to collect on the roof. Storing or protecting the catio during harsh winter weather can help it last longer.
Your cats deserve a safe outdoor space they can enjoy all year long — and building your own PVC catio makes it possible. Grab my printable DIY PVC Catio Building Guide and get the materials list, exact cut measurements, layout guide, and step-by-step photos you need to build with confidence.

Want My Exact Catio Measurements?
Skip the measuring math and material guesswork. The printable DIY PVC Catio Building Guide includes the complete supply list, exact cut measurements, layout guide, clickable shopping list, and step-by-step instructions.
More DIY Projects for Cat Owners
If you’re building a PVC catio, you might also love some of these other DIY projects designed to make life better for both you and your cats. If you need something more flexible, check out my portable PVC catio build for a lightweight, moveable option that works great for patios, decks, or even camping trips.
Once your structure is finished, don’t forget to make it comfortable and functional with these catio decorating ideas — simple additions like shelves, scratching posts, and cozy lounging spots can completely transform the space.
If you’re looking for more inspiration beyond outdoor enclosures, explore my favorite DIY projects for a cat-friendly home, where I share creative ways to incorporate pet spaces into your decor without sacrificing style.
And if outdoor access isn’t possible where you live, you might enjoy my guide to creating an awesome cat room inside your home, filled with ideas that blend smart design with feline fun.


Psst… the real fun is in the comments! See all the clever tips our readers have shared, and the sweet feedback about how much their cats love their new PVC catio spaces.

What part of the US are you in, do you have exrtreme heat or cold where you are? We do where I live and I wonder how durable the PVC is. We build a woodframe without treating and it only lasted 10 years. and I am looking for an alternative material.
Thanks
Leslie
Hi Leslie, I live in the northeast in MA. We get all kinds of weather. I’ve had the pvc catio for two winters and it hold up very well. I do however remove the roof because it would never hold the snow we get. Your lucky that your untreated wood catio lasted ten years! Mine lasted only two! 😊
This is totaly cool! I needtomake one for my cat! Thank you so much for sharing.
Thanks Susie
Hi,
Is there a way to get your instructions and supply list? I really need to do this for my cats.
Hi patty, yes. Click on the link in the post for the list and sign up and the password will be emailed to you. If you have any issues please email me at info@ourrepurposedhome.com
Thanks Lori
Hi Lori,
I had to send you an email at info@ourrepurposedhome.com.
Can’t wait to try this.
Just replied to your email. I hope that helps
Hi, I love this DIY. Was the garden fencing strong enough to last against any attempted climbing or chewing from the cats? Let me know! I am trying to decide between metal and plastic.
Hi Lindsey, until yesterday I haven’t had an issue with the cats chewing or climbing the fencing. But we have a new kitten who we just introduced to the catio. I was sitting on my deck and he was not happy that he couldn’t get to me and started climbing up the side and frantically chewing at the bottom to get to me. He did not succeed and eventually gave up. I did not see any damage though. I made the mistake of taking him out thru the door of the catio and I think that’s why he was trying to chew there. He saw that that section opened up. 🙄. I will let you know if this becomes an issue but honestly I think he will get used to it and not try again.
How would you attach it to the house so it doesn’t pull away and allow escape route?
Hi Amy, I would try using “U” brackets to attach it. This way it can wrap around the PVC pipe and attach to the house with screws. Or if you don’t want to drill into your house with screws you can attach it to the deck floor the same way. I don’t have mine attached because it is wedged between my house and the deck railing.
If you don’t want to do either then you can make a tunnel that goes from the window thru the opening in the enclosure. You would use your window to hold the tunnel on the house end and attach the other end directly to the pvc enclosure. This way the cats wont be able to have access to the enclosure any other way. I have mine like this. I purchased at cat door for a window and the tunnel goes right to the flap so they cant get around it. If your not attaching the enclosure to anything then I would make sure the house end of the tunnel is attached to the window opening.
I hope this helps. If you have any other questions please feel free to ask.
Lori
Thanks Lori! I’m going to build one!, but put it inside for the winter, then attach it to the house outside or build another one when spring comes. I’ve never had cats and have 2 terrier dogs I don’t trust with the cats. I want the cats to be able to come upstairs and be able to still go downstairs for their litter. I live in a rural area and there are huge coyotes here.so it will be a death sentence if they go outside. A month ago I heard a pack of coyotes howling in woods nearby, then a cat screech, then complete silence in the woods near my house. These little kitties are now healthy, spayed and vaccinated They were skinny & flea infested when they showed up (dropped off most likely) in August One was super friendly & the other was not. I just fed them a month while they lived outside until I could capture them both a mont later. So my plan is to build a PVC enclosure 12 ft long, 2 feet wide, 6 ft tall so it will fit under the door in the spring when I can put it outside the egress window. I will put it along the railing to the basement in the upstairs open concept LR/Dr/kitchen. They will still have access to the huge unfinished but heated & AC basement where I already created a cat paradise out of moving boxes. Am in Europe x 3 weeks and come home Saturday. Have live in sitter caring for the 2 dogs/ 2 cats while gone. Will work on this project as soon as I’m home! Thanks again you have some brilliant ideas Nancy
Nancy, that’s a great idea! I bet the dogs and cats will become friends by the end of the winter. This is a great way to introduce them and get them used to being around each other. I can’t wait to see it when it’s done!
I love this idea as I have made something unrelated out of PVC pipe. I would like this up against the house where there is an egress window to the basement where my new stray kitties are. Please explain how to attach it to the house or to the window as I am unclear on how you did that. Also, would cats use this in the winter in a cold, snowy climate? If I put the same material you used for the top on the sides, just for the winter, do you think they would use it? I will use a heavy duty cat door in the window. Thanks
Hi Nancy, What a great idea to use this for your basement window for your strays! I love it!
I do not have my enclosure attached to the house or the window. It sits right up against the house and doesn’t have room for the cats to squeeze between the house and the enclosure. It is sitting in between the house and the deck railing which holds it pretty tight to the house. However, before I made this enclosure I had another one that I made out of wood and screens and this one I made a “tunnel” of sorts between the window and the enclosure. That way the only access they had was through this tunnel. You could definitely make a tunnel that attaches to the pet door and goes directly into the enclosure.
But if you need to attach it somehow you could use u clamps and attach it to the house or a deck floor. Here is a link for you.
Nge 3inch Rigid Pipe Strap Clamp. Just make sure you get the ones for the size of the pipes your using.
Also, here is a link for the pet door that I purchased. I love it. Its very heavy duty and fits perfectly in the window. Ideal Pet Products Aluminum Sash Window Pet Door, Adjustable to Fit Window Widths from 27″ to 32″
As far as them using it during the winter, I usually take mine down. However, now that I have this heavy duty pet door I’ve noticed that it isn’t cold near it…yet. I’m thinking of leaving it up until we get snow because the roof will not hold any weight. Or, maybe I could add something on top of the roof for more support for the winter. I’ll have to think about that some. If I were you I would try it for the winter and see if the cats are interested in going out. I guess they would let you know if it’s too cold and stay inside. Just remember you’ll need to support the roof with something other than what I used. They do make heavier roofing panels that could work. I just liked the see thru one that lets in light.
Let me know what you decide and how it works for you.
Lori
Perhaps you could add a regular house awning (normally used above windows) they make all different types (or diy your own) that would give an extra layer & sturdier roof protection & not directly on top of your catio roof. Maybe a Pergola type idea, with weatherproof material attached underside or on top. I live in Phoenix, Arizona so we’re always trying to block sun & heat.
Love those ideas. Thanks for sharing
Came across this as I was looking for a way to build a non-permanent catio for our cats. We live on the second floor and have a large patio. Our cats are very curious so I was hopping to make a space outside that was safe for them because I see our patio turning into a great summer hangout compete with a cat-friendly patio garden.
This would be perfect for you. You can make it any size you want and it’s very lightweight. Let me know how it turns out.
Thank you for such an excellent explanation of the build for the catio. The information is exactly what I need. Looking forward to making a happy place for our 4 cats.
I’m so glad to hear that Merrin. Let me know how it goes. I’d love to see pics of your happy cats.
Thank you for such a well written and explanatory build of a catio with PVC pipe. I recently moved from acreage to an in town residence. I am using the chain link panels from my dog kennel. I am always looking for ways to incorporate ideas like shelving, catio covering, and decor items I think my cats would like. My kennel is in the back of my yard, but your PVC design also gave me an idea on how to make a cat walkway our of the board, wire and PVC. Again, thank you. I enjoy the read.
Thank you Annette i’m glad you found the blog post helpful. I’d love to see pictures of your catio and your walkway when you finish it 😊
I want to be able to build one for my cats but up stairs in my loft area what would be a good idea for that ., because due to others in the home they can’t roam around .
Annette, you could use the same plans I have but eliminate the window. Just measure the space and adjust the height if necessary.